Week One - Places - 24th January
In todays lecture we were given the new brief and we started the new module, this module is called "Places". To start off we went through and looked a lot of different photographers who produces work that would come under the heading of "Places".
First we started off by looking at Walker Evans - he was an American photographer best known for his work for the Farm Security Administration (FSA) documenting the effects of the Great Depression. Here below are some images that he produced that are of places :-

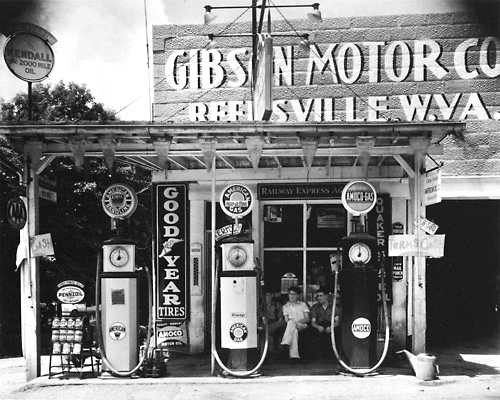
I like these images that Walker Evans took because of the composition that he uses and also i think that they are effect images now because shops and petrol stations don't look like that anymore, so seeing places like that now, i think make for interesting images.
Next we went on to look at Andres kertesz, he was known for his groundbreaking contributions to photographic composition and the photo essay. In the early years of his career, his then-unorthodox camera angles and style prevented his work from gaining wider recognition. Here are some of his images:-


Another photographer that we looked at in this lecture was Rene Burri - he is a Swiss photographer known for his photos of major political, historical and cultural events and key figures of the second half of the 20th century. Burri worked for Magnum Photos and has been photographing political, military and artistic figures and scenes since 1946. Here are 2 of his most famous places images:-


I like these 2 images because i think the decisive moment places a big role within images, because if he hadn't of pressed the button at the right time, these 2 images, especially the second one wouldn't look the same or be as effect to the viewers eyes.
Another photographer we looked at was a man named Michael Kenna - is an English photographer best known for his black & white landscapes.Kenna's photography focuses on unusual landscapes with ethereal light achieved by photographing at dawn or at night with exposures of up to 10 hours.


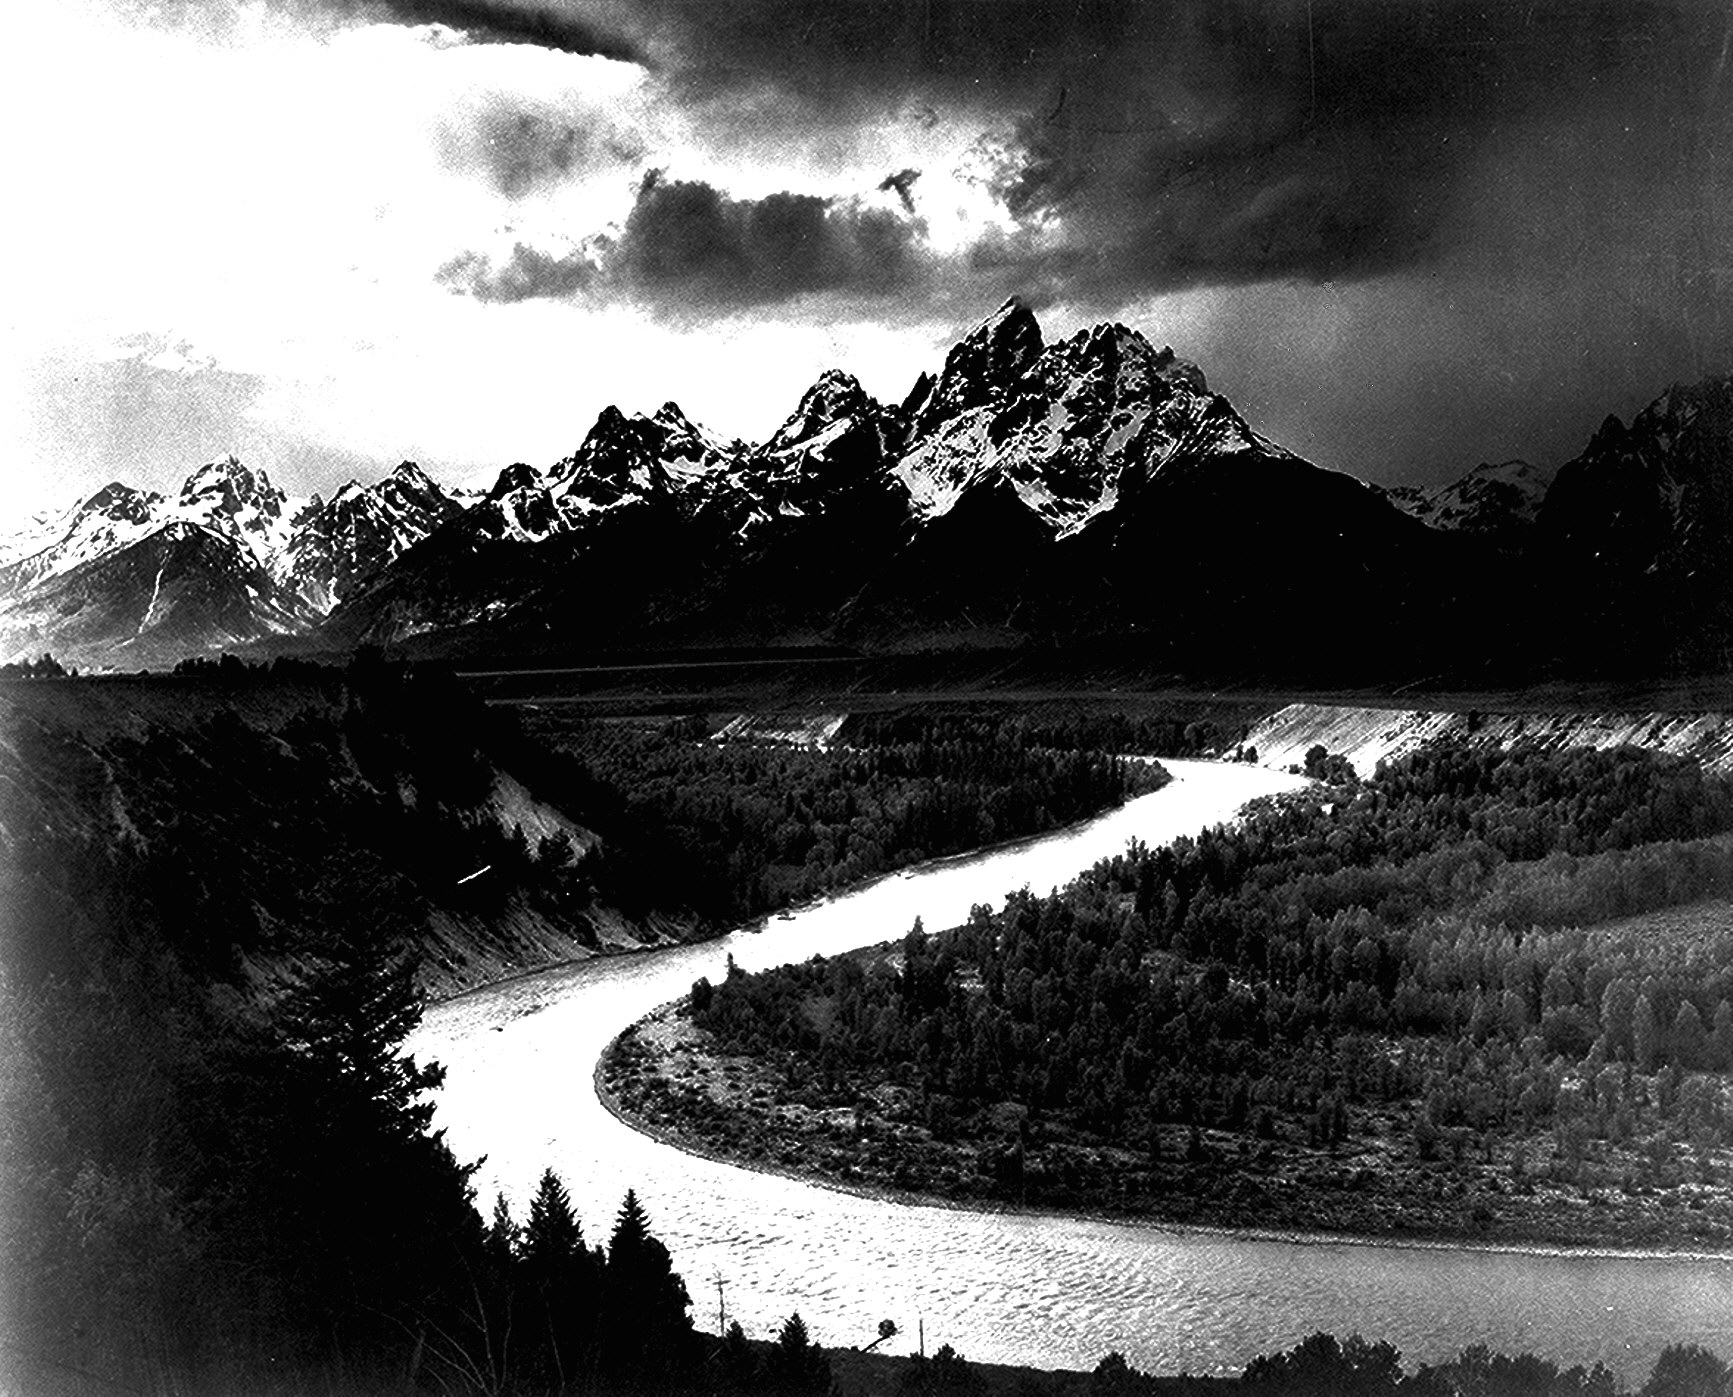
And lastly we looked at Ansel Adams - an American photographer and environmentalist, best known for his black-and-white photographs of the American West, he photographed nature and the minimal world. Here are some of his iconic picture below:-

As you have seen within the research that i have done above, places can involve many different genres, these can include:-
- Landscape
- Documentary
- Fine Art
- Photojournalism
- Macro/Abstract
- Interiors
- Architechual
Details are a important part of places - they don't always have to be big well known places, they can be just something as simple as a place that is close to you.
Also with taking images of places, you need to take in to consideration:-
- Reflection
- View Point
- Shutter
- Composition
Week 2 - Cameras - 31st January
In this weeks lecture we looked and researched into different types of cameras and the benefits that different cameras can have.
The types of cameras that we looked at in this weeks seminar were -


The second photographer that i have to research into is Jason Ingram. Jason Ingram graduated in photography from Salisbury College of Art in 1992. After three years assisting and two years working as a photographic hand printer, Jason launched his freelance career.
Based in Bristol, he travels widely photographing gardens, plants, food and people for magazines, books and design groups. He also works in collaboration with Monty Don, Carol Klein and Joe Swift on regular magazine features as well as providing the stills for BBC Gardeners' World television series. Jason brings an individual approach to all his work, combining his passion for photography and the subject itself.


The types of cameras that we looked at in this weeks seminar were -
- Pin Hole
- Hassle Blad
- Seagull
First we looked at Pin holes cameras. A pinhole camera is a simple camera without a lens and with a single small aperture – effectively a light-proof box with a small hole in one side. Light from a scene passes through this single point and projects an inverted image on the opposite side of the box. The human eye in bright light acts similarly, as do cameras using small apertures. http://en.wikipedia.org/wiki/pinhole_camera.
Here is an picture showing what a Pin Hole Camera looks like and how it works -
To research more into Pinhole Cameras we looked at a photographer who has produced both Landscape and Portrait work by only using a Pinhole Camera, His name is Bartosz Koszowski. Here is some of his work below :-
After researching and looking into Pinhole photography and the artist that i have shown above, i would like to try making my own Pinhole Camera and having a go to see what happens when i try myself. I would like to try this because it would be a different experience than just using my DSLR camera, and also this would help me to develop different skills, both in taking the image and developing the image too.
Next we went on to look at Hasselblad Cameras. A Hasselblad camera is a medium format camera that was produced by a man called Victor Hasselblad AB. This is what his cameras look like :-
And here are some images to show what the picture look like that come from a hasselblad camera:-
I have never tried or actually used a Hasselblad medium format Camera before, but from researching into them, i would like to have a try and expand on my skills in using different cameras. I would also like to use a medium format camera because i like photographs that are square shape, i think it just makes an image stand out from the rest and gives it something more.
Next we moved on to looking into Seagull Film Cameras. Seagull is the oldest camera maker in China. The product line of Seagull includes TLR cameras, SLR cameras, folding cameras, CCD and SLR camera lenses, large-format cameras, film, night vision scopes, and angle viewfinders. Seagull's cameras usually use basic, time-tested mechanical designs that require no batteries. http://en.wikipedia.org/wiki/Seagull_Camera.
At the end of the seminar and after researching into these different types of camera, we got to play around with some of these cameras just to see how they were and worked. While doing this i got to have a go with a Seagull Camera, I found it very easy to work and quite light to hold when taking images. I really liked the Seagull cameras and would like to use them more in the future.
And lastly within this seminar, we talked about the 3 different types of Film Formats.
- 35mm - ready to go and shoot - straight forward. Compacts and SLR's.
- 120 roll - Multiple aspect ratios and camera types :- TLR -twin lens reflex, SLR- single lens reflex, Range Finders and Pinhole Cameras. Medium Format.
- 4x5 - Sheet Film with Plate View, and Large Format.
Week 3 - Light Metering - 7th February
In this weeks theory lecture for our Places brief, we looked at Light Metering ad what that is all about.
A light meter is a device used to measure the amount of light. In photography, a light meter is often used to determine the proper exposure for a photograph. Typically a light meter will include a computer, either digital or analog, which allows the photographer to determine which shutter speed and f-number should be selected for an optimum exposure, given a certain lighting situation and film speed. ( www.wikipedia.org/wiki/light_metre ).
Here below are just 2 images to show an example of a Light metre.
To start of we learnt 3 main steps about Light Metering, Here are the 3 steps -
- DSLR's have evolved to make recording images easier for photographers.
- Regulation light into a camera was done when loading film into a camera ( Kodak Gold 100 Film).
- First thing you need to do is set your ISO, Aperture and your Shutter Speed.
Basic's -
The first step to metering light is to create a bench mark by entering and ISO.
Reflected Metering -
Point your metre towards the subject from where your camera is.
Incident Metering-
Point your meter towards your meter towards your camera from where your subjects is - measures the light falling on the subject.
Grey Card Reflecting Reading -
18 % Grey Card
Place the card in the area of the subject that your taking a photograph of, with the light reflecting off it.
Metering Flash - 2 Methods -
Open Flash with no cable
Cable Flash
Research - Photographers
To add to my research for this Places brief, I have research just 2 photographers that have produced work and photographed places but in 2 very different ways. The 2 different photographers are Amanda Harman and Jason Ingram.
First i looked at the work of Amanda Harman, she is An experienced and insightful photographer of people and places, Amanda Harman has worked on commissions and projects for galleries, museums, charities and private clients since graduating from Surrey Institute of Art and Design in 1985 with a first class degree. Her work has been exhibited widely in the UK and in Europe, and is held in a number of collections, including the V & A, London. She also holds an MA from London College of Communication. http://www.amandaharman.co.uk/about/project-work.htm
I have chosen to show her work of places on my blog because i like how she has kept a theme of them all being in black and white. I like this because i think that makes them look more effective as a body of work. I also like her images because of the way that she has taken them. The majority of them are blurred, like she has been moving through that place while capturing the image, i also think that this gives the images a really interesting effect, and also i think that this would make the viewer want to know where that place is and go and see it in person.
Here are some of her images below -


Based in Bristol, he travels widely photographing gardens, plants, food and people for magazines, books and design groups. He also works in collaboration with Monty Don, Carol Klein and Joe Swift on regular magazine features as well as providing the stills for BBC Gardeners' World television series. Jason brings an individual approach to all his work, combining his passion for photography and the subject itself.
I have picked Jason Ingram's work to research and show on my blog because even though both Jason and Amanda are both producing work on Places, they both do it in a very different way to each other. Amanda's work is blurred to show motion and is in Black and White, whereas Jason's work is in Focus, and in bright, bold colours.
Here are some of his images that show this-


Trip - Sunderland Point
The first trip that we went on as a group for our places brief was to Sunderland Point. This was just a chance for us to walk around and take images of the places and to gather images that could go towards our final images. Here below are some of the images that i took -

This first image i took of a boat that was just on the bay near the water. I took a picture of this boat because of the colours and because it looked quite old and looked liked it had been sitting for quite a while. I took it from this angel so i would be able to get the name of the boat in and also to get the ropes in that were holding it down. I like this image the most because i think your focus on the name, and so by doing that i think you want to know about the boat. I also took it at a different angel to make it stand out a little more rather than just taking the image from side on.
To edit this photo, all i did was the levels and i also added an action on to it that i downloaded from the internet.

I came across this gate and thought it would make for a good image, so i took a picture of it. I have edited this image just by turning it black and white. I think images like this one work well because with this one and the door one that i took in Liverpool, i think people want to go through the gate or and know what is on the other side. I just turned it black and white because i prefer black and white images.

This image kind of worked out like the gate image above did, I just across this half made wall with Mick sat in it and thought i would snap it while i could with him sat in it. I like this image because i think it comes under the " Decisive Moment", because i don't think the image would be as good or as effective if Mick hadn't had been sat in the wall. Again to edit it i just changed the levels, turned it black and white and added a vignette.

This image is one of my favourites, because the street sign and the lane both play equal part in making the image work. If one or the other hadn't of been there, the image would not have worked. In this image i like the composition of the image because i think when you have read the sign first because thats the first thing you see, i think the lane leads your eye down the image in the right place. Also with the effect that i have put on it using photoshop, i would say that it gives a theme or story to the image.

This is one of the first images that i took while on this trip out, but is also i think one of my least favourite. I think this because there isn't really much too it, nothing is really grabbing you into the image to make you interested. Also the colours aren't that strong or bold so again don't really add to the image to make it a stronger picture.
Trip - Liverpool
Again for this week of our Places brief, instead of having a theory lesson, we went out on a trip to Liverpool.
When we got to Liverpool the first place we stopped at was the big Clearance Gates where 1,300,00 Irish immigrants came through in the years 1845 - 1852.
We stopped here to take images because around that area were lots of broken down building, that told a certain story and would give interesting pictures at the end of it.
Here below are some of the edited pictures that i took from around area in Liverpool.

The first I took was of an old broken, run down building that was no longer being used for anything. I took this image because i thought that building look interesting and that a lot of things have happened here in the past. With taking a picture of this building though i didn't want to just take it from straight on because then you wouldn't be able to see a lot of the building and so wouldn't get the same effect. So instead i took it from far away on the other side of the road and on an angel.
After I took the image I edited it by sorting out the levels and sharpening it, then i also turned it black and white and added a vignette.

This image was taken from some gates pointing inside an old building grounds. I like and took this shot because i thought it looked kind of like an eery walk way. To add to the effect of this image and to make it more eery, i put it into photoshop and added an action over the top of it that turned into this more dramatic black and white colour that it has.

This is an image of the Clearance Gates in Liverpool that all the Irish Immigrants came through. I wanted to take this image, because even though it might like a stander image of the gates, i think it tells a very important story in history and of the Background in Liverpool. I took this image from straight on because i didn't want to take away from the story, and i wanted to keep it quite simple to look at as well.
To edit this image to make it look a bit better to the viewer, i just changed the levels, sharpened it and turned it black and white.

This final image is of a steel door way that I came across. There were many of these door ways right across the wall but instead i just wanted to single one out and take of picture of it on its own. I did it this way by just photographing one because i think it looks more effective, and by looking at it, i think you want to know as the viewer what is on the other side of the door.
To edit this image I changed the levels, sharpened it and upped the contrast and vibrance of the colours.
Trip - Formby and Crosby
The third trip that we went on was to Crosby and Formby. These places were both beaches and made really nice seascape pictures. Here again below i have just added a few images i have taken while out on this trip.

This first image i took was while we were in Formby, and as your walking down to the sea there is this new bridge walkway. I took a picture of this bridge because i thought it lead your eyes right down the centre of the image. i think this image works well as black and white because then your not distracted from the main part of the image - the bridge. To maybe improve on this image i would bend down so i was eye level, i think this would work better with the bridge and maybe get more of it in at the same too.

This second image is one of my best that i think i captured throughout the whole day while we were on this trip. i like this image so much because of the sky. The sky is the main factor within this image and it give a great impact on it too. I like how i have captured the sky at the moment when the cloud parted and the sun came through because by the sun coming through it add a bit more to the image by having the suns reflection on the dark sand at the bottom. I haven't really edited this image because i think its very effective as it is.

This image was taken in Crosby. All along the front at crosby there are loads of Man figures dotted about both in the sand and in the water. these status were made by an artist called Antony Gromley. I thought taking a picture of one of these status would make for a good image, because in the image that i have taken it looks like a human just stood in the water.I also like this image because of the reflection that you can see of it in the water, i think by it giving off a reflection it adds a little something more to the image to make it more interesting.

And lastly this is my last image, this image was also taken while in Crosby. This image is of a wooden fence that was along the path on the beach.I decided to take this image just to capture a simple image that would also be pleasing to look at and this is the shot that i got.
Trip - Forrest of Bowland
The last trip we went on for the Place brief was the Forrest Of Bowland. This day wasn't the nicest because of the weather that we had while we were there because it just made everywhere look gloomy and foggy. here are a couple of image that i have taken and edited of that trip.

I took this last while out on the trip and i took it because i thought it made a really landscape picture. I thought it made a good landscape image because of the way that water leads your eye down through the image and is centre to the hills around it. I also think it makes for a good image because its very clear even though the weather wasn't the best.

This second image is of branches when i was zoomed right in close to them. I took this image because it is very different to the images that i took that day and with images like this i think you have to look more closely to try and work out what the picture is of.

This image is of the Dunsop Sign and some tree that were next to the sign. I photographed it like this because i like it better from the side and not just from front on. I think with the trees being in the image too, it gives the photo a something more and something else to look at. Again i like this image better in black and white rather than colour, this because in the colour version they were dull and didn't improve on the image.

I took this images because i think i like taking pictures of doorways and it is quite similar to the blue steel door that i photographed in Liverpool. i think they make good photos because they are so simple yet so effective to the eye to look at. I think i will make this into a personal project of mine too.

Lastly this is an image of a "specials board" that i saw that was hung on the wall outside of a little conner shop. I took this image because its the kind of image that could be kept for memories, so in the future people can look back and see what they sold and how much cost. Its an image that is simple but effective.
Trip - New York City
The last trip we went on was the city of all cities - NEW YORK. I really enjoy this trip because i have never been to New York before, so ever thing looked amazing and it was also the prime opportunity to capture great images. So here below are just a few images that i took while in New York.

This image i took while just walking down a street in New York. This image is a of spiral statue. i could of photographed it just front on but thought that would look a bit boring, and that most people would photograph it from front on, so to try and make it different from the rest and much more interesting, i photographed it from one of the sides and looking up. I later turned it into black and white because i didn't like the colour version.


This image was taken on a day trip out to Coney Island. This image that i took is of the fair ground that was closed. I wanted to take a picture of the closed fair ground because, with it being all closed up it looked quite eery and interesting, so i decided to take a photograph. To improve on this image and trying not to take just a normal standard shot of the fair, I decided to try and make the composition more interesting by adding into the photo the fence that went around the fair ground.

This is an image of the Brooklyn Bridge, to get this image i walked along the bridge, and when i was about half way across i stood in the middle of the path and just took the image from straight on. I like this image because of the shape that fencing that is on the bridge gives to the image. By the fencing being there it leads your eye up through the centre of the image.

I have really enjoyed this brief and what it entailed because of all the different and new places that i got to visit, how i was able to capture each place in a different way. I think by doing this brief i was able to develop more my skills, i think i did by improving on how i actually thought about the image and capturing it but i also think i improved on the composition of my images too.
If i could go back and re shot some of the images, i think i would try to improve by having a individual project of my own, that in each different place there was something that i had to photograph and make a set of.
I conclusion i have really enjoyed this brief and i think i will still carry it on in my own time, by trying to visit different places and photographing them.